| < Prev | Home | Index | P1 | P2 | P3 | P4 | Next > | ||
| A01 | A02 | A03 | A04 | A05 | A06 | A07 | A08 | A09 | A10 |
| A11 | A12 | A13 | A14 | A15 | A16 | A17 | A18 | A19 | A20 |
| A21 | A22 | A23 | A24 | A25 | A26 | A27 | A28 | A29 | A30 |
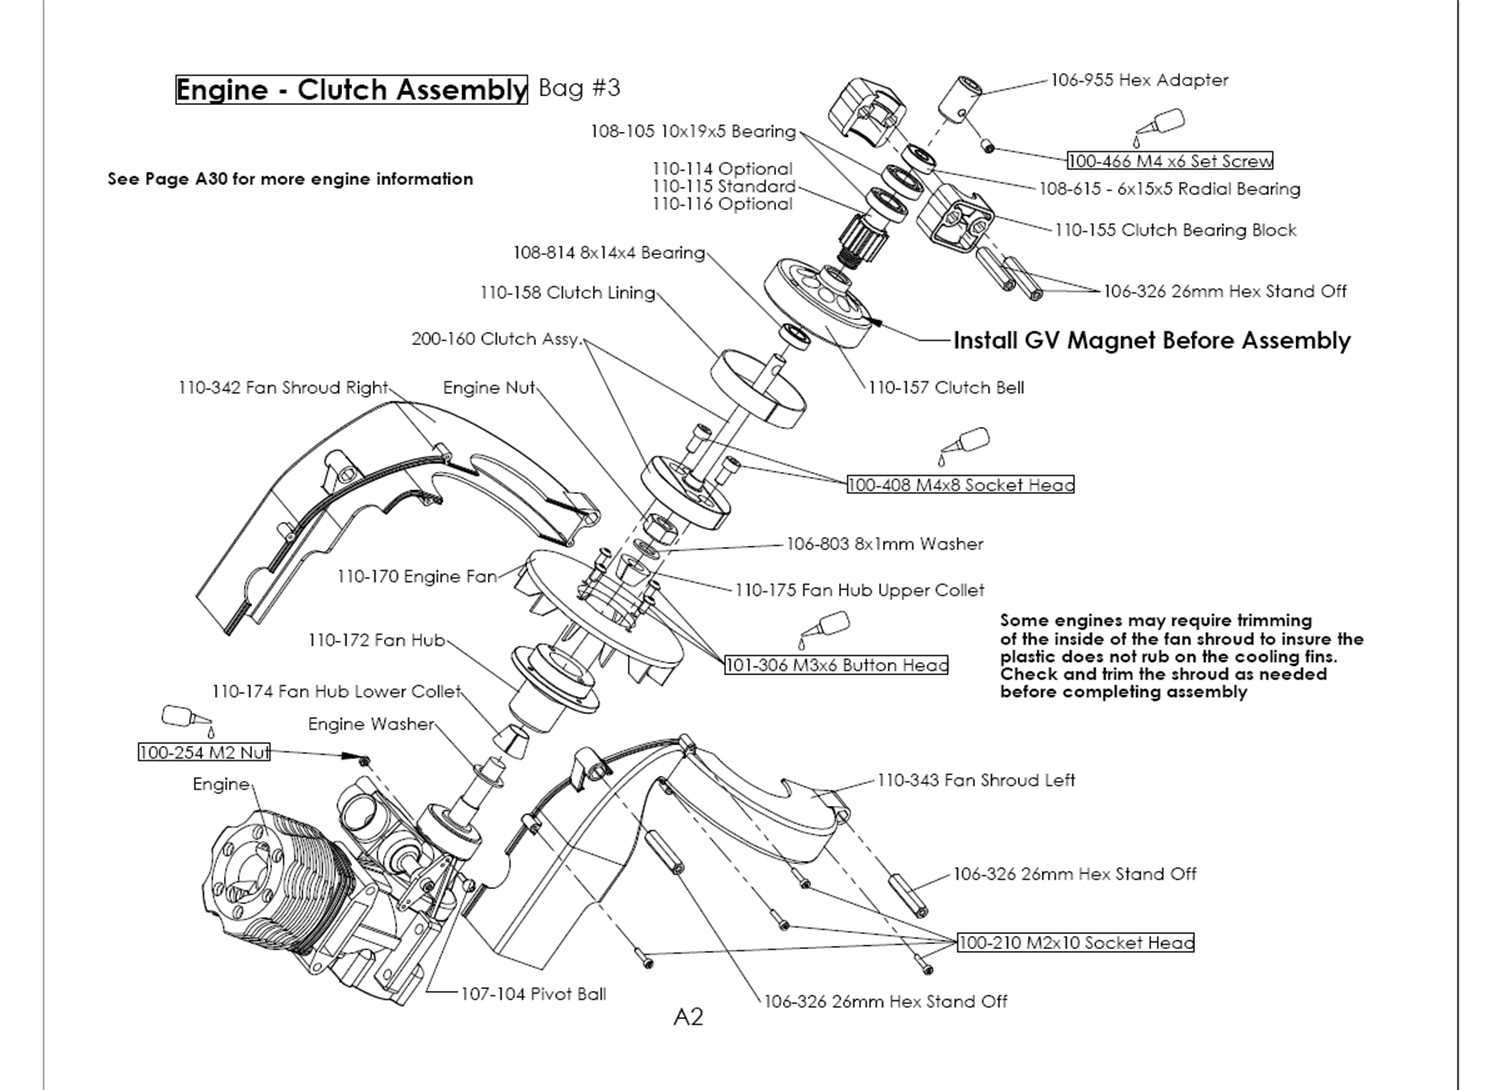
Make sure all these parts are cleaned with rubbing alcohol to remove metal shavings and dirt.
Be sure to check the order of the upper bearings (108-615). The smaller one goes up.
Hook up your governor electronics to test the magnet installation. One magnet should register and the other should be flipped over so that it doesn't. The stock sensor mounting location only gave me a reading of 23%. So I made the holes bigger to lower the sensor down. Other people are filling the magnet holes then gluing them to raise them to the proper height. Ideally you want a sensitivity reading of 97%.
Some people are reporting the upper fan collet (101-175) is too big. Synergy is aware of the problem and is in the process of distributing new ones. Some people are slotting their collets to make them fit properly.
Be sure to dial indicate the start shaft (200-160) to 4 thousandths or less. Click here for Jim Stark's video on how to do this.
Be sure to check your muffler mount at this point. The Hatori SB16FH requires 5mm of the left fan shroud (110-343) to be cut off.
There have been reports of the start shaft dislodging from the clutch assembly. Todd recommends using red loctite to fix the problem. If it comes out again, please contact Synergy Helicopters for a replacement clutch assembly.
Hex adapter removal: If you take off the link on the left hand cyclic servo and then use a pair of needle nose pliers to lever the adapter off gently, you'll find it much easier to remove.
The 100-210 M2 x 10 bolts that are used to assemble the fan shroud would be better if they were 12 or 14 mm bolts.
Fan shroud: Align the shroud as the last part of this step. Make sure all shroud bolts are loosely fitted in order to hold the shroud in place. Spin the start shaft with one hand while moving the shroud with the other hand to get an idea of where the shroud needs to be locked down. Slowly snug each shroud bolt while adjusting the shroud for clearance.