| < Prev | Home | Index | P1 | P2 | P3 | P4 | Next > | ||
| A01 | A02 | A03 | A04 | A05 | A06 | A07 | A08 | A09 | A10 |
| A11 | A12 | A13 | A14 | A15 | A16 | A17 | A18 | A19 | A20 |
| A21 | A22 | A23 | A24 | A25 | A26 | A27 | A28 | A29 | A30 |
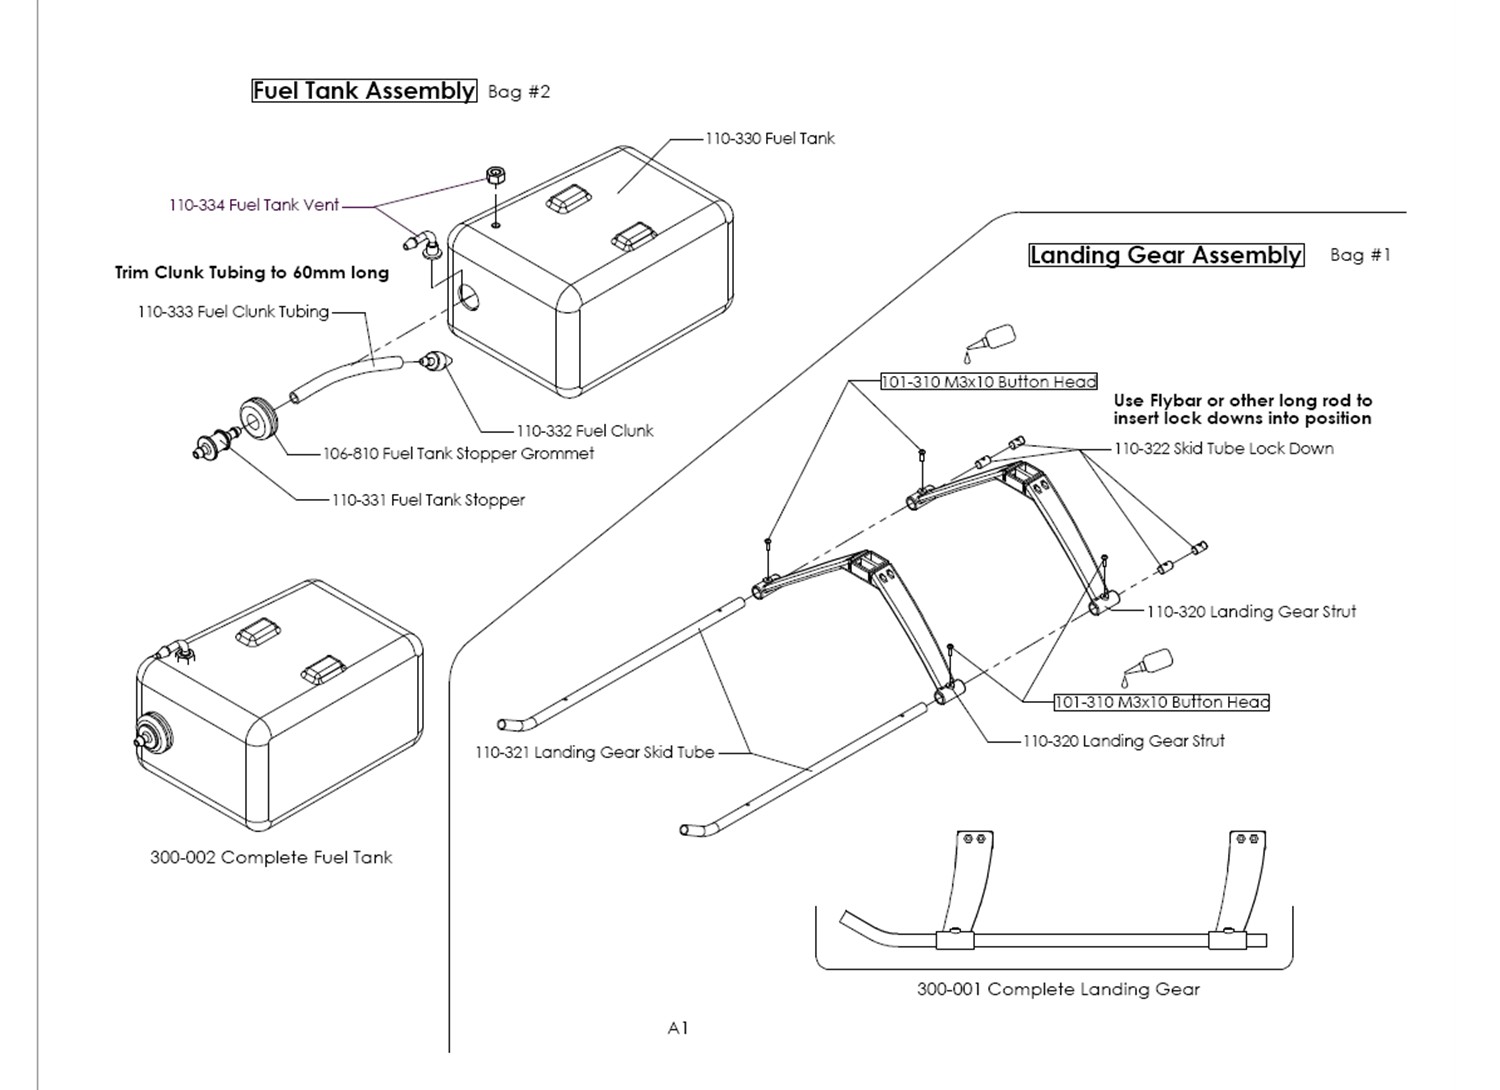
Ron Lund has been adding a 90 degree Tettra fuel vent (TET4206) to the Synergy kits instead of 110-334. This makes for an easier installation. It goes on the top hole of the tank, not the side fuel fitting as shown in the top diagram.
Todd recommended cutting off the part of the fitting inside the tank as close as you can so that you can fill the tank as much as possible. Once the fuel level reaches the bottom of this part, the fuel will start gushing out the vent tubing. Also, the inside nut came loose and fell off into the tank. I stripped the threads on the fitting to lock the nut. Tettra makes a fitting with a flange flush to the tank, TET4216, which is available through Central Hobbies.
Todd also recommended a longer clunk than the 60mm shown. The setup as shown is good when using an OMI fuel magnet, available from Rick's.
I used a coat hangar from the front and the flybar from the back to manipulate the skid lock downs (110-322) into place. Look for the holes to line up. Other people use CA to secure the lock down to a dowel which is secure enough to manipulate it into place. After screwing in the set screw, rotate the dowel to break it off the lock down.
Fuel vent: Use tweezers and a 2mm wrench to perform the assembly. First grasp the fitting with the tweezers and carefully insert the fitting into the tank. Next, place the 2mm hex wrench into the vent hole at the top of the tank. Insert the 2mm wrench into the fitting and use it as a guide to align it with the vent hole. With the 2mm hex wrench still in the fitting, you can now grab the fitting with a pair of ball link pliers. The 2mm hex wrench will keep the fitting from collapsing due to the pressure of the pliers. Carefully pull the fitting the rest of the way through the vent hole.